Apart from subject, angle and technical aspects there is another momentous consideration for eye catchy photographs which is lighting. A splendid click might be ended up as vanity due to the lack of perfect light. Despite being the integral part of photography beginners frequently overlook the effectiveness of lighting owing to their lack of experience while a professional photographer always look for perfect light. In terms of outdoor photography nature plays the key role whereas you can experiment a lot in indoor where the reins is in your hand. To materialize your imagination a handful of types of lighting narrated in this article to enhance your skill of photography.
Contents
Sunlight the main source of natural light, reflects straightly on the subject and often results extreme brightness. Noticeable shadow and lofty contrast is the byproduct of direct sunlight. Subject directly exposed in the sun isn’t always what we keen of while cautious use of it can produce a pleasant piece of art. Notwithstanding, when we think of something raw and natural for example documentary, sunlight is the best and easiest option to utilize.
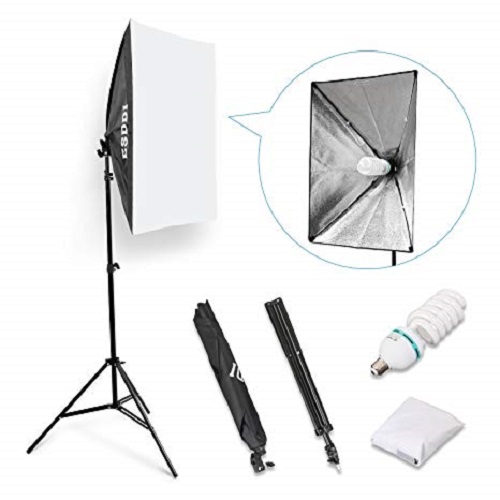
For strong color composition mild or soft light is incomparable. For example cloudy day, immediately before and after the sun set is the perfect condition for mild light and you can set it artificially at home by using various lighting equipment available in the market. Especially when it comes to close shot photos as well as portrait images. In soft light condition the subject keep fully clasped by lights, consequently defy the shadow. When the intention is to dig deep of a photograph and capture every possible details of its soft light is the perfect choice but the photographer needs to be quite meticulous regarding combination of light and subject.
When the source disperse light directly on the subject from the front it create ANTERIOR lighting. Light can come from back of camera or from the camera itself (flash). Shadow get obliterate wholly in this form which makes it the least used as without shadow images look faded or lifeless. In most cases amateurs confide in heavily on front lighting due to the fact that it enlighten the subject evenly and produces a bright image but in long run lose its appeal.
Backlight is due when the camera encounters the subject in front of the light source. Photography background will get more exposure instead of subject and light source will be bleak as the subject shading it. Picture gets a bit dazzling as the subject impedes lighting which is on the other hand smeared around the subject and confront the lens. When you think about some extra depth in your work back lighting is for you. In addition, it offers a bit dramatic effect on the photography. Unnecessary manifestation as well as unwanted shadow could perish the artwork if backlight not used accordingly.
Inspired by the work of the Dutch artist Rembrandt Harmenszoon van Rijn and named after him, Rembrandt lighting is specialized in producing picturesque photo with depth, in a natural look without being sluggish at a minimal use of equipment. Basically used in crafting studio portrait photography. In order to create REMBRANDT, you have to place the main source of light at high level on one side and a reflector or another light source which is comparatively less powered (approx 50%) on the other side of the subject at a low level. The reflection of key light on other source cast a triangular or diamond shape underneath the eye.
A form of side lighting use to enhance narrow face by creating an anomalous angle between lights landing on the subject and the camera. To bring the best of broad lighting, camera need to be placed along with the best lit side of the subjects’ face which will scatter a shadow on the other side consequently the face will get a fuller look. In addition, broad lighting is being used extensively in hiding some unwanted feature in photo. For example, you can easily ignore any spot in your face or any facial feature that you want to hide by placing it in the shadow.
Brief lighting is directly in contrast with broad lighting. In this case the camera need to be in close proximity on the shaded side of the face in order to slender the view. For the people who have wide, round, or heavy face, brief lighting plays a pivotal role to orchestrate their desired look. But thing need to be considered is, shadow has few deficiencies such as drawing texture which will give a feel of discomfort. Astute use of it can defy the shortcomings (pimple and scars) emanated by shadow and create something eye catchy.
Mostly being used in studio photography with various flash power, nevertheless high key can be attainable by any camera which can highly expose the photo and operational in manual mode. A recipe to engineer dazzling photos without losing the details and not being contrasty. A white wall which has the caliber to reflect light will be a sampling ambiance for high key photography apart from studio arrangement. All you need is a compact camera and take an overexposed shot. Bit of fine tuning by using post processing software will deliver something more eye warming. In studio condition, subject just need to be encircled by soft outstretched lightingin front of an overexposed background.
While enlighten the subject is the norm and bring the best details are practicing minutely, low key offers something else for those who have thirst for novelty and don’t freighted of experimenting. Low key is incomparable in terms of creating dramatic, dark and mysterious art which is in contrast with high key. Should you are privileged enough to use a studio, a handful of options are available for you to set the tune. The first and foremost thing is to set a dark (usually black) background with a lighting arrangement that doesn’t encounter the subject hardly to veil body texture and wrinkles. Place the subject bit up front and don’t forget to kill the flash to materialize your dark imagination.
A photo can be taken regardless of circumstances by anyone but to transfigure it into a visual treat you must have to take a few things in account such as lighting, angle, technical features of the camera. To be a proficient photographer most significantly you have to be carefree about criticism and tireless in clicking. Rest will be decided by your imagination.
 |
 |
 |
 |
Check These Out
