Have you ever watched a film and marveled at how the camera glides through a scene without a single wobble? Understanding how camera stabilizer works is the single biggest step you can take toward professional-looking footage. The answer involves gyroscopes, counterweights, and motorized axes working in concert to cancel out the natural movement your body produces. Whether you're filming a wedding, a travel vlog, or a narrative short, this guide breaks down the mechanics, the technique, and the real-world application. For more essential skills, explore the full library of photography articles on DigiLabsPro.
A camera stabilizer counteracts the micro-movements your hands, arms, and body produce whenever you're in motion. Every step you take, every breath you draw, every shift in weight — your body transmits those vibrations through your arms and straight into your camera. Without a stabilizer, those forces translate directly into jitter and shake on your sensor. With one, they're absorbed, countered, or isolated before they ever reach your footage.
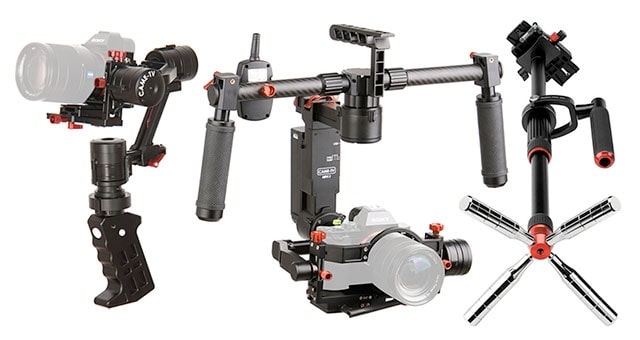
There's more than one way to stabilize a camera, and each approach solves the problem differently. Mechanical systems use weights and pivots. Electronic gimbals use motors and sensors. Optical systems work inside the lens or the sensor itself. Knowing how each one functions helps you pick the right tool for every situation. If you're building your skills from the ground up, the guide on digital photography tips and tricks for beginners is a solid foundation to start from.
Contents
Every camera stabilizer — regardless of type — targets the same three axes of movement: pan (left/right), tilt (up/down), and roll (rotation around the lens axis). Camera shake occurs across all three simultaneously. Effective stabilization addresses all three at once, either mechanically or electronically.
Mechanical stabilizers exploit the physics of a spinning gyroscope. A gyroscope resists changes to its orientation due to a property called angular momentum — the faster and heavier the spinning mass, the more resistance it offers to displacement. Early film stabilizers used heavy spinning flywheels to resist the camera operator's hand movements and keep the frame level during a walk.
Counterweight-based systems work on a simpler principle: balance. When you position the center of mass below the pivot point, the system naturally returns to a neutral position whenever it's displaced. This is the core mechanic behind the classic Steadicam design. The camera sits on a sled, the sled hangs from a pivot, and counterweights below the center of gravity keep the entire assembly naturally upright regardless of how the operator moves.
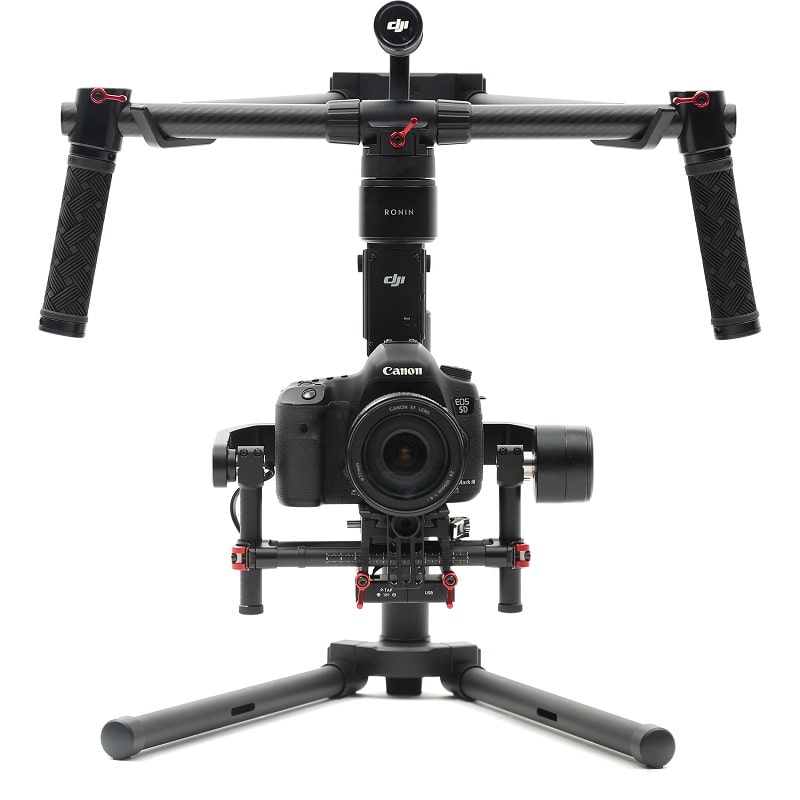
Modern electronic gimbals take a fundamentally different route. They use internal inertial measurement units (IMUs) — combinations of accelerometers and gyroscopes — to detect movement in real time. When the IMU registers a deviation from the target orientation, brushless motors on each axis fire instantly to counteract it. The feedback loop runs thousands of times per second. That speed is what sets electronic gimbals apart from everything that came before them.

Before diving into technique, it helps to see the full range of available technologies side by side. Each one solves the stabilization problem from a different angle:
Proper balance is the foundation of effective stabilization. An unbalanced gimbal forces the motors to work constantly just to hold position — draining battery, stressing hardware, and producing noticeably inferior footage. Get the balance right before you power on.
Follow these steps to balance a 3-axis electronic gimbal correctly:
Pro tip: Always balance your gimbal with motors OFF. Balancing with motors running masks poor balance and will shorten motor life over time.

Even the best gimbal can't fully compensate for poor body mechanics. Your technique directly affects the quality of the stabilization you get. Here's what experienced operators consistently do:
Good operator technique and a properly calibrated stabilizer together produce results neither can achieve alone. The gear handles the physics. Your body handles the execution.
Knowing how camera stabilizer works in theory is one thing. Seeing how each type performs during an actual shoot is where that knowledge becomes actionable. The table below compares the five major stabilizer technologies across the factors that matter most to working photographers and videographers.
| Stabilizer Type | Core Mechanism | Best For | Battery Required | Learning Curve |
|---|---|---|---|---|
| Electronic Gimbal | IMU sensors + brushless motors | Video, run-and-gun, travel | Yes (4–14 hrs typical) | Medium |
| Steadicam / Mechanical | Counterweight + iso-elastic arm | Cinema, long narrative takes | No | High (months of practice) |
| Optical (OIS) | Floating lens element shift | Photography, light handheld video | No (uses lens power) | None |
| In-Body (IBIS) | Motorized sensor shift | Photography, all lens types | No (uses camera battery) | None |
| Electronic (EIS) | Software crop and warp | Action cameras, smartphones | No | None |
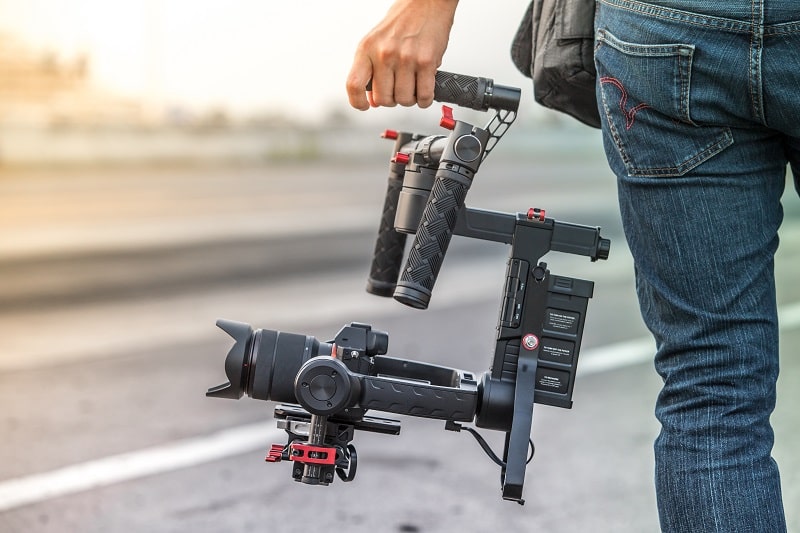
Electronic gimbals dominate the consumer and prosumer video market. They're compact, effective, and increasingly affordable. A 3-axis gimbal can take an entry-level mirrorless camera and produce footage that looks like it came from a fully rigged production. The IMU reads movement thousands of times per second, and the motors respond in milliseconds. This near-instantaneous feedback loop is what separates electronic gimbals from every mechanical alternative.
The trade-offs are real, though. Battery life, payload limits, and the time required to balance and configure the system before each shoot all add friction to your workflow. If you're also running lens filters — a very common addition — check out the guide on types of camera filters and their uses, because filter weight must be factored into your gimbal balance before you roll.

The Steadicam is a purely mechanical system. The camera mounts on a sled suspended from an iso-elastic arm, which connects to a vest the operator wears. The iso-elastic arm absorbs vertical movement, while the counterweighted sled resists rotational and lateral forces. Together, they produce the gliding, floating movement that defines classic cinema stabilization — no motors, no batteries, no software.
Mastering it takes months of dedicated practice. At the professional level, a Steadicam operator is a specialist role, not just a camera operator with extra gear. For event and wedding photographers who also shoot video, this system is overkill. For narrative filmmakers chasing a specific cinematic look in long, uninterrupted takes, it's irreplaceable.
OIS and IBIS require no additional hardware — they're built into the gear you already own. Optical stabilization shifts a lens element to compensate for movement; in-body stabilization physically moves the sensor. Both are designed primarily for still photography and light video use. They handle small, high-frequency vibrations effectively — the kind your hand tremor produces — but they don't replace a gimbal for extended walking shots. Think of them as a complement to external stabilization, not a substitute for it.
Stabilizers aren't for every situation, but when the conditions are right, they transform what you can capture. Use one when:
Portrait and lifestyle photographers will find stabilizers especially useful during candid shooting sessions. The ability to move naturally while keeping the frame steady lets you focus entirely on your subject. For portraits specifically, pair your stabilizer work with the techniques in the guide on capturing genuine expressions in couple photography — smooth camera movement combined with authentic subject interaction produces images that look effortless. For controlling your scene's look further, the deep-dive on types of lighting in photography covers how to build a setup that works with your movement rather than against it.
A stabilizer isn't always the right call. Skip it when:
Warning: Leaving OIS or IBIS enabled during tripod shots is one of the most common causes of mysterious softness in otherwise well-composed still images — always disable it when your camera is stationary.
An electronic gimbal is precision equipment. Dirt in the motor housings, outdated firmware, and a drifting IMU calibration all degrade performance over time. Stay on top of these maintenance tasks and your stabilizer will perform consistently for years.
Just as you track shutter actuations to monitor camera wear, track your gimbal's usage patterns. If stabilization quality noticeably decreases, motor recalibration or a factory reset is usually the first step. For monitoring your camera's overall health alongside your stabilizer, the guide on how to check shutter count of your camera covers the tracking methods that most photographers overlook.
How you store and transport your stabilizer directly affects its longevity. Electronic gimbals are more robust than they look, but the axis motors are sensitive to impact and sustained pressure.
Treat your stabilizer with the same care you extend to your lenses and camera body. The investment in a quality gimbal is substantial, and routine maintenance is what protects that investment over the long term.
A stabilizer doesn't hide bad technique — it amplifies the quality of good technique, so master the fundamentals and let the gear do what it was built for.


About Editorial Team
The DigiLabsPro editorial team covers cameras, lenses, photography gear, and creative technology with a focus on helping photographers make informed buying decisions. Our reviews and guides draw on hands-on testing and research across a wide range of equipment, from entry-level beginner kits to professional-grade systems.
You can get FREE Gifts. Or latest Free phones here.
Disable Ad block to reveal all the info. Once done, hit a button below
