You sit down to cull through a morning's worth of RAW files from your latest shoot, and your laptop takes thirty seconds just to open the first folder. That kind of slowdown signals a machine overdue for serious attention, and knowing how to clean laptop faster transforms a frustrating experience into a smooth, reliable workflow. Whether you edit photos professionally or simply manage a heavy daily workload, accumulated clutter — both digital and physical — drags your system steadily away from its potential. Build better maintenance habits now and explore more creative tech guidance in our library of photography articles.

Laptop slowdowns happen for two distinct reasons: physical dust blocking airflow and cooling efficiency, and digital clutter consuming your available storage, RAM, and CPU cycles simultaneously. Both require attention, and the good news is that most of the process costs nothing, requires no specialized skills, and produces results you'll feel within the first hour of completing it. The key is working methodically — hardware first, then each layer of your operating system — until your machine responds the way it once did.
Understanding which problem affects your machine most guides your priorities effectively. A laptop that throttles its processor under load needs physical cleaning before anything else, while one that boots slowly and opens applications sluggishly benefits most from software optimization first. Most machines need both, and this guide walks you through every step with enough depth to do it correctly from start to finish.
Contents
Gathering the right supplies before you begin saves you from stopping mid-process with a machine partially disassembled or a cleanup script half-finished. The tools divide cleanly into two categories — physical supplies for the hardware exterior and software utilities for the digital interior — and you need both ready before starting either process.
You don't need a professional repair kit to clean your laptop effectively, but specific items make the job safer and more thorough than improvising with whatever's already in your drawer. Here's what to have on hand before you begin:

The digital side of a cleanup relies primarily on tools built into your operating system, supplemented by a handful of trustworthy third-party applications. Windows users have access to Disk Cleanup, Task Manager, and the built-in Defragment and Optimize Drives utility. Mac users work through Storage Management, Activity Monitor, and the Login Items panel inside System Settings. Beyond native tools, applications like CCleaner provide a single interface for removing temporary files and registry entries across multiple system locations in one pass.
The distinction between passive cleaning tools — those that remove junk files — and active optimization tools — those that manage startup sequences and defragment storage — matters because you need both working together for genuine, lasting speed improvements rather than a temporary boost that fades within days.

Software maintenance accounts for the majority of performance gains most users experience, because it addresses the invisible accumulation of processes, fragmented files, and background services that steadily drain your system's resources. Work through the steps below in sequence for the most effective results.
Temporary files accumulate every time you browse the web, install software, or run editing applications, and they never clean themselves automatically. On Windows, open Disk Cleanup from the Start menu, select your primary drive, check every category presented — including system files when prompted — and delete the entire selection. On macOS, go to Apple menu → About This Mac → Storage → Manage and work through the Optimize Storage recommendations until the most space-consuming categories are resolved.
Beyond the built-in tool, manually clearing the %temp% folder on Windows by pressing Win+R and typing the path removes files that Disk Cleanup sometimes skips. Photographers who regularly process RAW batches accumulate gigabytes of preview cache, scratch disk data, and export temp files that standard cleanup utilities never flag for removal on their own.
Pro tip: Always restart your laptop immediately after a full cleanup session — freed resources and cleared cache directories don't fully take effect until the system reinitializes all services on a fresh boot.
Startup programs are among the biggest contributors to slow boot times and sluggish initial performance. Every application configured to launch at startup consumes RAM and CPU cycles before you've opened a single file. On Windows, open Task Manager with Ctrl+Shift+Esc, navigate to the Startup tab, and disable every entry you don't need immediately at boot. On Mac, go to System Settings → General → Login Items and remove entries individually with a single click.

For photographers and digital creatives, a slow laptop creates problems that extend beyond frustration — it delays deliverables, interrupts creative momentum, and accelerates hardware wear. Certain scenarios make the impact of accumulated clutter especially severe, and recognizing them helps you decide when a full cleanup is urgent rather than optional.
Lightroom Classic, Capture One, and Photoshop rank among the most resource-intensive applications on any machine. They hold large portions of your working catalog in RAM, write preview data to disk continuously, and push the GPU hard during batch exports. When your system already carries hundreds of background processes and megabytes of temp files, these applications absorb that burden immediately and visibly. Running a full software cleanup before a major editing session consistently cuts rendering and export times in ways you'll notice within the first batch.
If editing RAW files from a recent shoot feels noticeably slower than it used to, and your laptop runs hot throughout those sessions, the combination of thermal throttling and digital clutter is almost certainly the compounding cause behind the performance gap you're experiencing.
Transferring and organizing thousands of image files stresses your storage subsystem, and a nearly full drive or fragmented file system makes the import process dramatically slower than your hardware is capable of. Before sitting down to import a new project, verify that at least 15–20% of your drive remains free and that your destination storage is on a recently optimized drive. If you use SD cards for intermediate storage, understanding write-speed class differences — as covered in the comparison of SanDisk Ultra vs. Extreme cards — prevents bottlenecks at the point of import that have nothing to do with your laptop's performance at all.
One of the strongest arguments for learning how to clean laptop faster yourself is the financial case — most of the process costs nothing beyond your time. The table below breaks down realistic costs across different approaches so you can decide where your situation falls on the spectrum from fully DIY to fully professional.
| Cleaning Method | Estimated Cost | Time Required | Best For |
|---|---|---|---|
| DIY software cleanup (built-in OS tools) | Free | 30–60 minutes | Regular maintenance, any machine |
| Premium third-party optimization software | $20–$50/year | 15–30 minutes | Automated scheduled cleanups |
| DIY physical cleaning (compressed air + cloths) | $5–$15 one-time | 20–40 minutes | Dust removal, improved cooling |
| Professional internal fan cleaning | $50–$120 | Drop-off service | Heavy internal dust, older machines |
| Full professional optimization service | $80–$200 | Drop-off service | Severely degraded performance |
The tools built into Windows and macOS handle the vast majority of what most users need — temporary file removal, startup management, storage analysis, and drive optimization — without any additional spending. Paid applications like CCleaner Professional or Malwarebytes Premium add value primarily through automation: scheduled cleanups that run without manual input on a calendar you define. For a photographer managing one primary machine, combining native tools with a disciplined personal routine delivers results that match or exceed most paid subscriptions.
Machines more than three to four years old often benefit from professional attention because internal fans and heatsinks accumulate layers of compacted dust that exterior compressed air can't reach. If your machine runs consistently hot even with a cooling pad providing airflow from below, a professional teardown with fresh thermal paste on the CPU delivers temperature reductions — and the performance gains that come with them — that no software routine achieves. Weigh the cost of a professional service against the cost of a replacement machine to make the calculation that actually fits your budget.
Taking ownership of your laptop maintenance gives you control, builds practical knowledge, and delivers immediate results without scheduling delays or concerns about handing a machine with sensitive client files to a third party. You learn to recognize the early warning signs of degradation — increasing fan noise, longer boot sequences, laggy application launches — before they compound into serious problems. The diagnostic instincts you develop through consistent self-maintenance pay dividends every time something goes wrong on a deadline-sensitive day when a repair shop appointment isn't an option.
If you're unsure whether your machine's struggles relate to the hardware type itself rather than maintenance gaps, the detailed breakdown in our article on laptop vs. notebook differences clarifies which form factor handles intensive creative workloads more effectively at the hardware level.
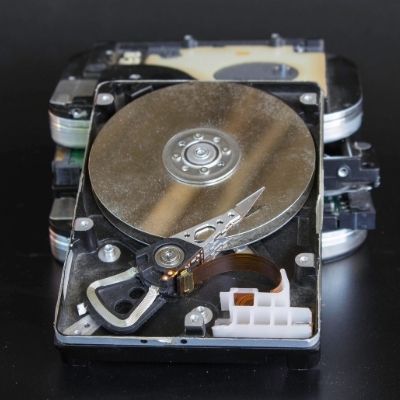
The limits of DIY maintenance become apparent when performance problems originate in hardware degradation rather than software accumulation. Thermal paste on the processor dries out and cracks over years of heat cycling. Compacted dust fills heatsink fins in ways that only a full disassembly can address. Aging mechanical drives develop bad sectors that cleanup tools don't repair. A professional technician also identifies hardware problems — failing storage media, loose RAM — that explain slowdowns no amount of software cleaning will resolve, saving you months of troubleshooting for the cost of a single diagnostic fee.
Warning: Opening your laptop's chassis to access the internal fan voids the manufacturer warranty on most machines still within their coverage window — verify your warranty status before attempting any internal cleaning yourself.
The difference between a laptop that stays fast and one that degrades into frustration comes down almost entirely to consistency. A monthly routine under thirty minutes prevents accumulated clutter from ever becoming a crisis, keeping your machine reliable between deeper quarterly sessions. Set a recurring calendar reminder and treat it the same way you treat sensor cleaning or memory card formatting — a small investment of time now that saves a significant amount of time later.
For photographers, scheduling your monthly cleanup one day before a major project import puts your machine at peak performance exactly when the workload hits hardest. Also worth noting: your battery's condition affects perceived performance over extended use, and understanding how your machine behaves under different power configurations is explored in our guide on whether a laptop works without its battery — useful context for anyone who frequently works from a fixed desk setup.
Every three months, go deeper than the standard monthly routine to address issues that accumulate at a slower rate. This is the session where you defragment mechanical hard drives (never SSDs, which optimize automatically), run a full malware scan across all drives, verify that your operating system and device drivers are current, and audit every browser extension for continued relevance. A consistent quarterly deep clean keeps your machine at 90% of its original performance indefinitely — a realistic and achievable standard when the routine is maintained without gaps.
Photographers who want objective confirmation that a cleanup produced measurable results can compare boot times, application launch speeds, and file transfer rates before and after each quarterly session. Building good maintenance habits across all your creative gear — from your laptop to your camera body — produces more reliable results and longer equipment lifespans across everything you own. Our guide on checking your camera's shutter count demonstrates the same systematic approach applied to camera hardware, and the mindset transfers directly. If you're also building your photography workflow setup from scratch, our digital photography tips for beginners covers the hardware and software decisions that lay the right foundation from the start.
Run a software cleanup every month — covering temporary files, startup programs, and disk space — and perform a more thorough quarterly session that includes malware scanning and driver updates. Physical cleaning with compressed air every two to three months prevents dust buildup from restricting airflow and triggering thermal throttling under load.
Yes, consistently and measurably so, particularly on machines that haven't been maintained regularly. Removing temporary files frees storage the operating system uses for virtual memory and cache operations, disabling startup programs reduces boot time and frees RAM, and clearing dust from vents lowers operating temperatures enough to prevent CPU throttling during demanding tasks like photo editing or batch exporting.
Disabling unnecessary startup programs delivers the fastest noticeable improvement with the least effort. Open Task Manager on Windows or Login Items on Mac, disable everything non-essential, and restart your machine. Boot time drops immediately, and your RAM is available for the applications you actually need from the first moment the desktop loads.
Yes, when used correctly. Hold the canister upright to prevent liquid propellant from discharging onto internal components, keep the nozzle at least a centimeter from any vent opening, and use short two-to-three second bursts rather than continuous blasts. Block the fan blades with a toothpick while cleaning so they don't spin freely at high speed, which can damage the motor bearings.
A clean laptop isn't a one-time fix — it's a habit that compounds over time, and every hour you invest in maintenance returns twice as much in performance, reliability, and uninterrupted focus during the work that actually matters.


About Editorial Team
The DigiLabsPro editorial team covers cameras, lenses, photography gear, and creative technology with a focus on helping photographers make informed buying decisions. Our reviews and guides draw on hands-on testing and research across a wide range of equipment, from entry-level beginner kits to professional-grade systems.
You can get FREE Gifts. Or latest Free phones here.
Disable Ad block to reveal all the info. Once done, hit a button below
