What separates a flat, lifeless landscape shot from one where the sky blazes and water runs like silk? The answer lives in glass — specifically, the types of camera lens filters that mount to your optic and transform light before it ever reaches the sensor. These precision tools accomplish work that no post-processing slider can replicate, from physically cutting polarized glare to compressing dynamic range in high-contrast scenes. Explore our photography articles section and you will find filters sitting at the core of nearly every serious outdoor workflow.

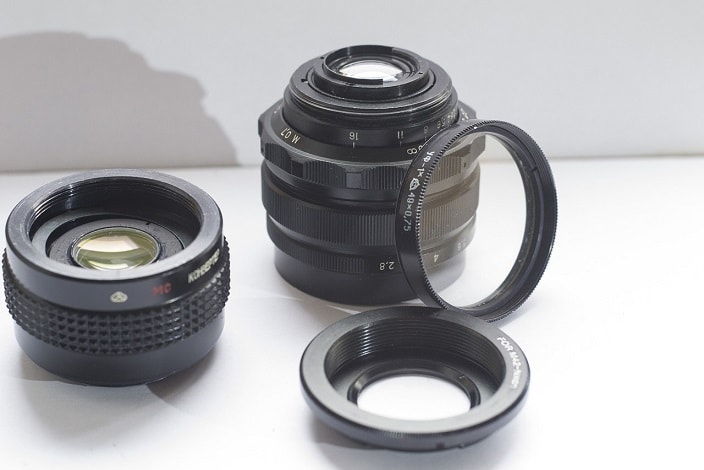
Camera filters come in three primary physical formats: threaded screw-on rings that attach directly to your lens barrel, drop-in square or rectangular slabs that slot into a dedicated holder system, and magnetic quick-mount rings designed for rapid field swaps. The threaded variety works best for single-filter setups where you change glass infrequently, while the square system gives you cross-lens compatibility with one filter set and a handful of step-up adapter rings handling the rest.
Understanding filter physics at a fundamental level changes how you approach every exterior shoot. A circular polarizer eliminates reflections by blocking light waves oscillating on a single plane, and that effect cannot be recovered in post because the polarized light was never captured in the first place. Build your filter kit with purpose and intention, and every shutter press benefits from decisions made before you lift the camera to your eye.
Contents
Seven filter categories cover the vast majority of professional use cases, and knowing what each one does at the optical level lets you reach for the correct glass without hesitation in the field. The table below maps each type to its primary optical mechanism, the shooting scenarios where it delivers the most value, and the exposure compensation you should expect when it enters your light path.
| Filter Type | Optical Mechanism | Primary Use Case | Exposure Impact |
|---|---|---|---|
| UV / Haze | Absorbs ultraviolet wavelengths | Lens protection, high-altitude haze reduction | None (negligible) |
| Circular Polarizer (CPL) | Blocks single-plane polarized light | Glare elimination, sky contrast, foliage saturation | –1.5 to –2 stops |
| Neutral Density (ND) | Reduces all wavelengths equally | Long exposures, wide aperture in bright light | –1 to –10+ stops |
| Graduated ND (GND) | Graduated density across the frame | Balancing sky vs. foreground exposure | –1 to –4 stops on bright half |
| Variable ND | Two polarizing layers rotated against each other | Run-and-gun video, versatile stills | –2 to –8+ stops (variable) |
| Color / Warming | Selective wavelength absorption | Color correction, mood, film emulation | Minimal to moderate |
| Close-Up / Macro | Positive diopter lens element | Macro magnification without a dedicated macro lens | None |
A UV filter serves two distinct purposes: it absorbs the ultraviolet radiation that mattered enormously in film-era photography, and more practically today, it places a replaceable piece of glass between your front element and everything the world can throw at it. High-altitude shooting, salt spray environments, and dusty trails all justify keeping one mounted permanently, provided you invest in a multi-coated option from a reputable manufacturer rather than a no-name ring that introduces flare at every artificial light source in the frame.
The circular polarizing filter is the single piece of glass that earns its price on nearly every outdoor shoot you undertake. Rotate the front element until reflections vanish from water surfaces, glass facades, and wet foliage, and you immediately reveal color and texture that would otherwise remain invisible under the glare. Midday shooting in harsh direct sunlight — typically a recipe for washed-out skies and blown highlights — becomes entirely workable with a CPL dialed to maximum polarization effect when positioned 90 degrees to the sun.
Matching filter to scene requires you to think in terms of light behavior rather than aesthetic preference or habit. Shooting into a backlit subject at golden hour calls for a graduated ND to protect highlight detail in the sky while exposing correctly for the foreground — not a polarizer, which loses all effectiveness when pointed directly toward or away from the sun. Understanding the relationship between sun angle and filter performance is the fastest way to stop reaching for the wrong glass in critical moments.
For landscape work, a three-filter system covers almost every lighting condition you encounter on location:
Architecture benefits from a warming filter in flat overcast light and a CPL whenever glass facades or rain-slicked pavement create distracting reflections that pull the eye away from the structure itself.
Portrait shooters rely on ND filters primarily to maintain wide apertures in bright ambient conditions, preserving shallow depth-of-field rendering without switching to a faster shutter speed that your flash sync ceiling cannot accommodate. A 3-stop ND gives you room to shoot at f/1.8 in open shade without overexposing, pairing naturally with the strobing techniques detailed in the Best Lighting for Portraits guide. Color and warming filters over studio strobes shift light quality in ways that gels accomplish more precisely, so in portrait work, filters belong on the lens rather than the light source.
The mechanical process of mounting a filter seems trivial until you introduce vignetting, thread stripping, or ring misalignment that degrades corner sharpness on wide angles. Screw a filter onto a clean, dry lens thread using finger pressure only — never force a cross-threaded ring or you risk permanently bonding the filter to the lens barrel. Check the glass for smudges and micro-abrasions before every shoot, because even a hairline scratch scatters light across the frame in any high-contrast condition you encounter.
Stacking a UV under a CPL under a solid ND introduces three additional glass surfaces, each capable of contributing internal reflections, color shift, and edge diffraction to your final image. Limit stacking to two filters maximum unless your holder system uses premium multi-coated glass throughout, and always position the polarizer closest to the lens so you can rotate it freely without disturbing the outer elements. On ultra-wide lenses below 24mm, even a single standard-depth ring can produce subtle vignetting in the frame corners at maximum aperture — use slim-profile rings specifically manufactured for wide-angle use.
The square filter ecosystem — built around systems from manufacturers like Lee Filters, NiSi, and Cokin — offers positioning precision that threaded rings cannot match for landscape and architectural work. You buy one set of 100mm or 150mm filters and adapt them to every lens diameter in your bag using inexpensive step-up rings, rather than purchasing duplicates in every thread size your lenses require. Magnetic filter systems attach via a magnetized adapter ring and allow swaps in under two seconds — a genuine advantage during fast-moving shoots where conditions shift before a conventional ring can be unscrewed.
A handful of misconceptions about camera filters circulate persistently through photography forums and social communities, and believing them costs you either money or measurable image quality. The most damaging myth is that UV filters are optically neutral at any price point — in reality, a low-quality UV filter introduces measurable flare and contrast reduction that a bare front element does not, which is why professional rental houses typically store lenses without UV rings attached and available for use.
Polarizing effects, long-exposure motion blur, and physical vignette control are not recoverable in post under any workflow you can name. Polarization by definition requires filtering light before it enters the lens — no Lightroom adjustment recovers eliminated reflections because that reflected light was never recorded on the sensor. Graduated ND blending in post works reasonably well for static scenes, but any movement in the frame — waves, wind-blown foliage, pedestrians — makes a physical GND the only clean solution available to you.
Filter glass quality varies enormously across price tiers, and the difference reveals itself immediately in demanding lighting conditions. A budget variable ND exhibits a dark X-pattern of destructive interference when rotated past its recommended range, while a premium variable ND maintains clean, neutral tonality through its full rotation. Investing in one excellent CPL beats owning three mediocre ones spread across different lens diameters, every single time.
If you are assembling your first filter kit, three pieces cover the majority of real-world situations without overwhelming your budget or your learning curve. Start with a multi-coated UV in your most-used lens diameter, a mid-range CPL from a reputable optical brand, and a 3-stop solid ND for basic long-exposure work in bright midday conditions. These three filters address the scenarios you encounter most frequently — outdoor portraits, landscapes in variable light, and water or sky work where extending shutter speed transforms the image entirely. The core principles in the Digital Photography Tips and Tricks for Beginners guide apply directly here: understand the tool before you expand the toolkit.
Working professionals and serious landscape photographers typically build around a square-filter system with a full ND progression:
Adding a CPL adapter for the square holder eliminates the need to stack a separate polarizing ring, keeping the total glass elements in the optical path to the absolute minimum your system requires.
The technical discipline you apply around your filters matters as much as the filters themselves, and most image quality losses attributed to filter glass are actually the result of poor maintenance and careless handling. Clean your filter glass with a microfiber cloth and a single drop of lens cleaning solution before every session — dust and oil on the front element scatter light in ways that degrade contrast across the entire frame, not just in the immediate area of contamination. Store filters in hard-shell cases with individual compartments rather than loose in a bag, because a single hairline scratch on a CPL costs you polarization efficiency at exactly the moment you need it most.
Your camera's through-the-lens metering system reads light after it passes through the filter, so exposure compensation is largely automatic for CPL and graduated ND work — the meter adjusts for the light reduction it measures without any manual intervention required. Solid ND filters above 6 stops push light transmission below the threshold your autofocus and metering systems can function in, requiring you to compose, focus lock, and meter before mounting the filter, then calculate the extended shutter speed using the filter's rated stop reduction. A dedicated ND calculator app removes the arithmetic entirely and keeps your mental bandwidth free for composition and timing decisions in the field.
When a filter is the source of degraded image quality, the evidence appears in consistent, repeatable patterns that distinguish it clearly from lens aberration or sensor noise. Vignetting that appears only with a specific filter at wide apertures points directly to the filter ring's internal diameter obstructing the light cone entering the lens. Flare radiating from artificial point sources that disappears when you remove the filter identifies a low-quality coating problem — not the lens, not the scene, but the glass you placed in front of the lens before the shoot.
Budget ND filters introduce a magenta, green, or blue cast that shifts across the density range as you extend exposure time into long-exposure territory. The correction workflow is straightforward and adds minimal time to your editing session:
If you find yourself performing the same color cast correction for the same filter across an entire season of shooting, that cumulative time investment exceeds the cost difference between your current filter and a higher-quality replacement by a substantial margin.
The X-pattern darkening in variable ND filters occurs when you rotate the front element past the manufacturer's maximum recommended stop value — the two polarizing layers create destructive interference that renders as a dark cross radiating from the center of the frame. The field fix requires discipline rather than gear: mark the maximum recommended rotation point with a fine-tip paint pen on the filter ring's edge and treat that mark as a hard stop, not a flexible guideline. When your shooting conditions demand more light reduction than the variable ND's usable range provides, switch to a stacked solid-ND plus CPL combination instead and accept the slightly longer setup time as the cost of clean imagery.
The circular polarizing filter delivers the broadest real-world benefit across landscape, travel, and outdoor portrait work — eliminating reflections, deepening sky contrast, and saturating foliage in ways that post-processing cannot replicate under any circumstances. If you buy only one filter for your kit, make it a quality CPL from a reputable manufacturer.
Modern multi-coated lenses do not require UV filtration for optical purposes, since digital sensors capture no meaningful UV radiation anyway. A UV filter serves as a physical front-element protector, which is a legitimate use case in harsh environments like beaches and dusty trails, but remove it for studio and controlled shooting where flare from artificial light sources is a real risk.
A variable ND covers a range of densities in a single filter body, which is genuinely convenient for run-and-gun video work and fast-paced location shoots. However, it introduces X-pattern artifacts at extreme settings and generally delivers lower optical quality than a matched set of premium fixed NDs at equivalent total price. Use variable ND for video and speed-priority work; use fixed NDs for critical landscape and long-exposure stills.
Most filter types have no meaningful impact on autofocus speed or accuracy under normal ambient light levels. Very dark solid ND filters — 10 stops and above — reduce light transmission below the threshold your camera's phase-detect autofocus system requires, so you must achieve focus lock before mounting the filter and switch to manual focus before making the exposure.
Buy the filter thread size that matches your largest-diameter lens, then use inexpensive step-up adapter rings to fit it onto all smaller lenses in your kit. This approach keeps your filter investment consolidated in one size rather than duplicated across three or four thread diameters, and the slight vignetting risk on ultra-wide lenses is manageable by using slim-profile ring versions of your most frequently used filters.
For landscape photographers who regularly deploy graduated ND filters, the square system pays for itself quickly because it allows you to position the graduated density zone anywhere in the frame rather than being locked to the horizontal center line. Portrait and event photographers rarely benefit enough from that added positioning control to justify the holder hardware investment and the increased field setup time the system requires.
Use a bulb blower to dislodge loose particles before making any physical contact with the glass surface, then apply a single drop of optical lens cleaning solution to a clean microfiber cloth — never directly to the filter — and clean using circular motions from the center outward toward the edges. Paper towels, shirt fabric, and compressed-air cans all introduce micro-scratches or static charge that attracts new dust immediately after the cleaning is complete.
The filter you skip buying is the one you will desperately wish you had the moment the scene that defines your portfolio appears directly in front of you.


About Editorial Team
The DigiLabsPro editorial team covers cameras, lenses, photography gear, and creative technology with a focus on helping photographers make informed buying decisions. Our reviews and guides draw on hands-on testing and research across a wide range of equipment, from entry-level beginner kits to professional-grade systems.
You can get FREE Gifts. Or latest Free phones here.
Disable Ad block to reveal all the info. Once done, hit a button below
