What separates a forgettable portrait from one that stops a viewer cold? The answer, almost every time, is light. Mastering the best lighting for portraits transforms your work faster than any camera upgrade, and the techniques are accessible whether you shoot with a single speedlight or a full multi-strobe studio rig. This guide — part of the photography articles collection at DigiLabsPro — walks you through every approach, from natural window light to advanced modifier setups, so you can produce compelling images in any environment.
Portrait lighting is not about owning expensive gear — it is about understanding how light behaves in terms of direction, quality, intensity, and color temperature, and then shaping those four variables to flatter your subject. Once you internalize these fundamentals, a parking garage, a hotel room, and a professional studio all become equally viable shooting environments.
Before you adjust a single modifier, take a moment to study how light falls on a face in your current environment. Notice where shadows pool under the nose and chin, how catchlights position themselves in the eyes, and where the transition from highlight to shadow sits along the cheekbone. That edge — the terminator line — is where portrait lighting becomes a craft, and learning to control it precisely is the foundation everything else builds on. If you are newer to these concepts, the digital photography tips and tricks for beginners guide provides a solid baseline before diving deeper here.
Contents
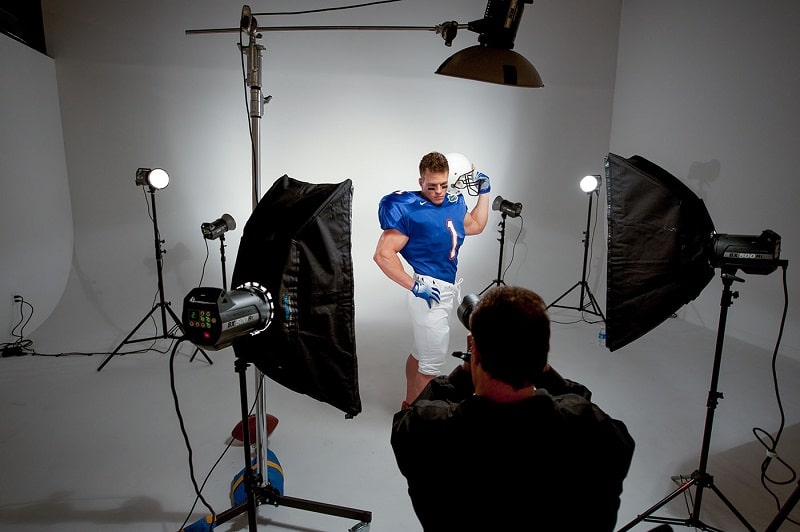
Working photographers — from headshot specialists to editorial portraitists — rely on a surprisingly small set of proven setups. Understanding these real-world configurations gives you a mental toolkit you can deploy on any shoot, under any deadline.
A single well-placed light source with a reflector opposite it is the workhorse of professional portrait photography. Here is how pros configure it:
This configuration produces the Rembrandt lighting pattern — named after the Dutch master — when the key light falls at a steeper angle, leaving a characteristic triangle of light on the shadow-side cheek. It reads as dramatic and painterly without requiring a single additional light head.
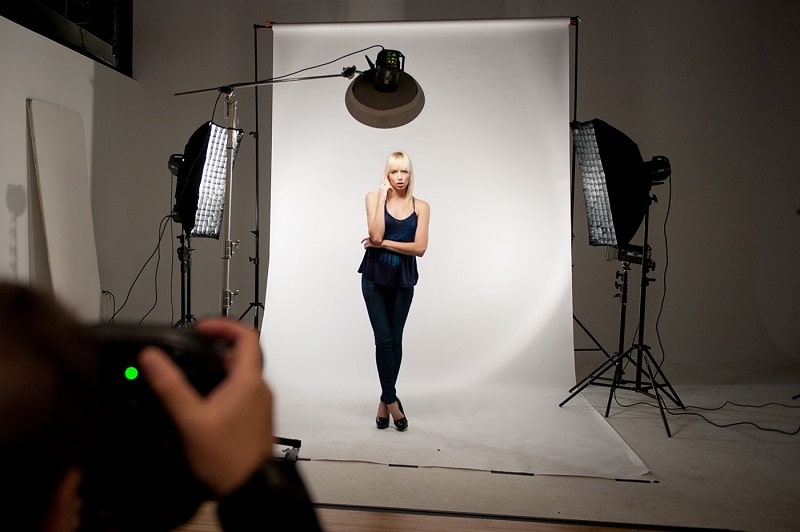
Adding a second light unlocks separation and control that a single source cannot provide:
Pro insight: Your fill light should almost never match the color temperature of your key — a slightly cooler fill (5600K vs 5000K key) adds a subtle dimensionality that looks natural on screen and in print.
The gap between a beginner lighting kit and a professional one is real, but it is narrower than most newcomers assume. Your technique and understanding of light physics matter more than your gear's price tag at virtually every stage of your career.
With a modest investment you can produce studio-quality portraits consistently:
For headshot photographers especially, these tools are more than sufficient for client-ready work. The 10 tips for taking professional headshots guide covers exactly how to leverage simple setups for commercial results.
Advanced modifiers solve specific problems that entry-level gear cannot address efficiently:
The best lighting for portraits is not a single pattern — it is the right pattern for a specific subject, mood, and context. Knowing all five core patterns and when each is appropriate is what separates a competent portrait photographer from an exceptional one. According to Wikipedia's overview of photographic lighting, each classical pattern has roots in fine art portraiture that pre-dates photography itself.
| Pattern | Key Light Position | Best For | Shadow Ratio | Difficulty |
|---|---|---|---|---|
| Rembrandt | 45° side, high angle | Dramatic, character portraits | 3:1 to 4:1 | Intermediate |
| Loop | 30–45° side, slightly high | Commercial headshots, general portraiture | 2:1 to 3:1 | Beginner |
| Butterfly | Directly in front, high | Beauty, glamour, feminine portraits | 1:1 to 2:1 | Beginner |
| Split | 90° to the side | High-contrast, editorial, masculine portraits | 4:1 to 5:1 | Beginner |
| Broad/Short | Toward lit or shadow side of face | Face shape control (narrow or widen) | Variable | Intermediate |
Pattern selection is driven by the subject's face shape and the emotional goal of the image:

Photographers who try to assemble a complete studio in one purchase almost always end up with redundant gear and gaps in their capability. A deliberate, staged approach to building your kit produces a far more capable system for the same budget spent over time.
Follow this acquisition sequence to maximize your capability at each stage:
Warning: Resist purchasing a second monolight before you have exhausted what one light and a reflector can do — mastering a single-source setup builds the observational skills that make every subsequent light you add genuinely useful.
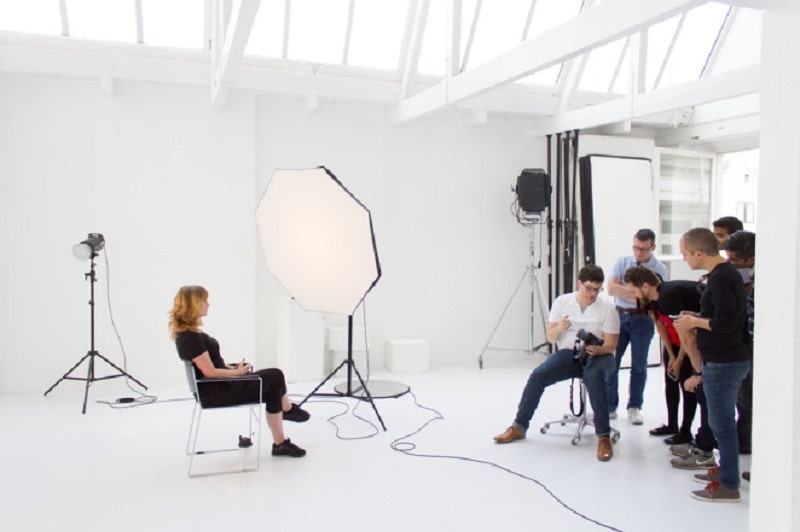
The most nuanced portrait lighting work combines artificial sources with the ambient light already present in your shooting environment:
Technical knowledge of patterns and gear means nothing if your in-session execution is inconsistent. These are the practices that distinguish photographers who deliver predictable quality from those who hope for it. After you master your lighting workflow, pairing it with a fast post-processing routine — like the techniques in 4 Quick Edits in Lightroom to Speed Up Your Workflow — produces finished images significantly faster.
Light quality is determined by the apparent size of your light source relative to your subject — a principle that governs every modifier decision you make:
Consistent exposure across a session — especially with multiple subjects or during a multi-hour shoot — requires disciplined metering:
A single monolight or speedlight fitted with a medium shoot-through umbrella, placed at 45 degrees to your subject at slightly above eye level and paired with a white reflector on the opposite side, produces the loop lighting pattern — the most universally flattering setup for almost any face shape, and the starting point for most professional portrait photographers.
Absolutely — a large north-facing window on an overcast day is one of the best light sources available to a portrait photographer. The key is treating it like a studio strobe: position your subject so the window becomes your key light at a 45-degree angle, use a reflector or white foam board on the opposite side as a fill, and shoot in RAW to retain full dynamic range for post-processing.
For a standard 60×90 cm softbox, a distance of 1 to 1.5 meters from your subject produces flattering, directional soft light with enough falloff to avoid spilling onto your background. Moving the softbox closer produces softer, more wrapping light; moving it further produces harder light with more defined shadows. Adjust based on the mood and shadow ratio your image requires.


About Editorial Team
The DigiLabsPro editorial team covers cameras, lenses, photography gear, and creative technology with a focus on helping photographers make informed buying decisions. Our reviews and guides draw on hands-on testing and research across a wide range of equipment, from entry-level beginner kits to professional-grade systems.
You can get FREE Gifts. Or latest Free phones here.
Disable Ad block to reveal all the info. Once done, hit a button below
